WooCommerce
Download the latest version of this plugin
Check out our GitHub repository (opens in a new tab) to download previous versions.
Compatibility
Compatible with version 6.x of Woocommerce and upto 6.x of Wordpress.
Introduction
This module enables the woocommerce customers to pay for their items using the payment gateway. What does it do? Presents the option to pay with credit card or debit card via the payment gateway.
Installation
-
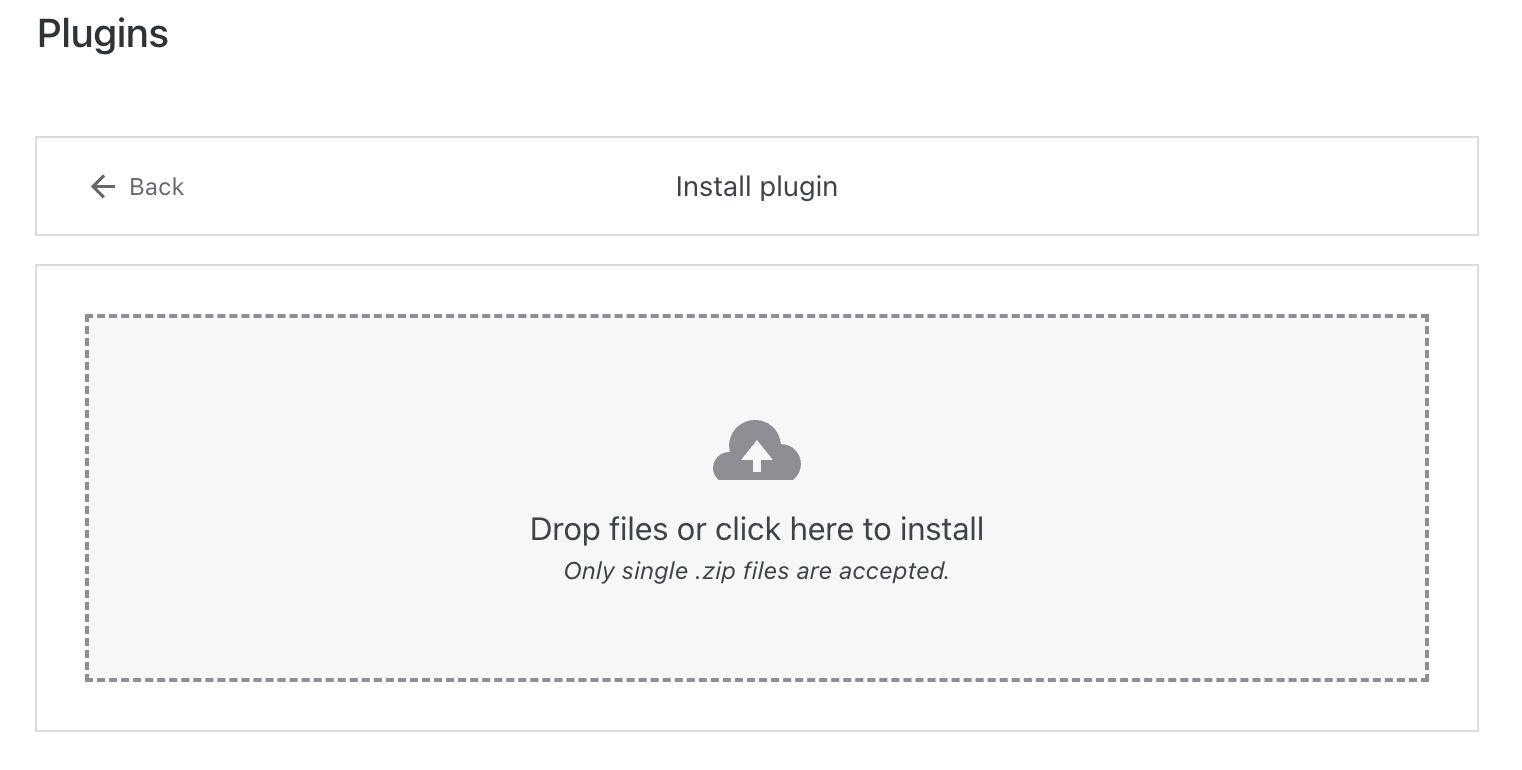
Go to the plugins section of the admin panel
-
Click Add New
-
Click Upload plugin (Near the top left of the page next to the menu)
-
Click the "Choose File" button and select the module (zip file)
-
Click the "Install Now" button and then click the "Activate" button.

Manual installation
- Unzip and upload the plugin folder to your /wp-content/plugins/ directory
- Activate the plugin through the Plugins menu in WordPress
- Go to WooCommerce -> Settings and click on the Checkout tab.
- Find PaymentNetwork in the Payment Gateways section
- Click the settings button to configure and enable the gateway.
- Click 'Save Changes'.
Setup Instructions
Setting up the module requires at a minimum a merchantID, a signature/secret key and a gateway URL i.e. https://gateway.example.com (opens in a new tab) to be entered in the plugin's settings.
-
Go to WooCommerce -> Settings -> Payments
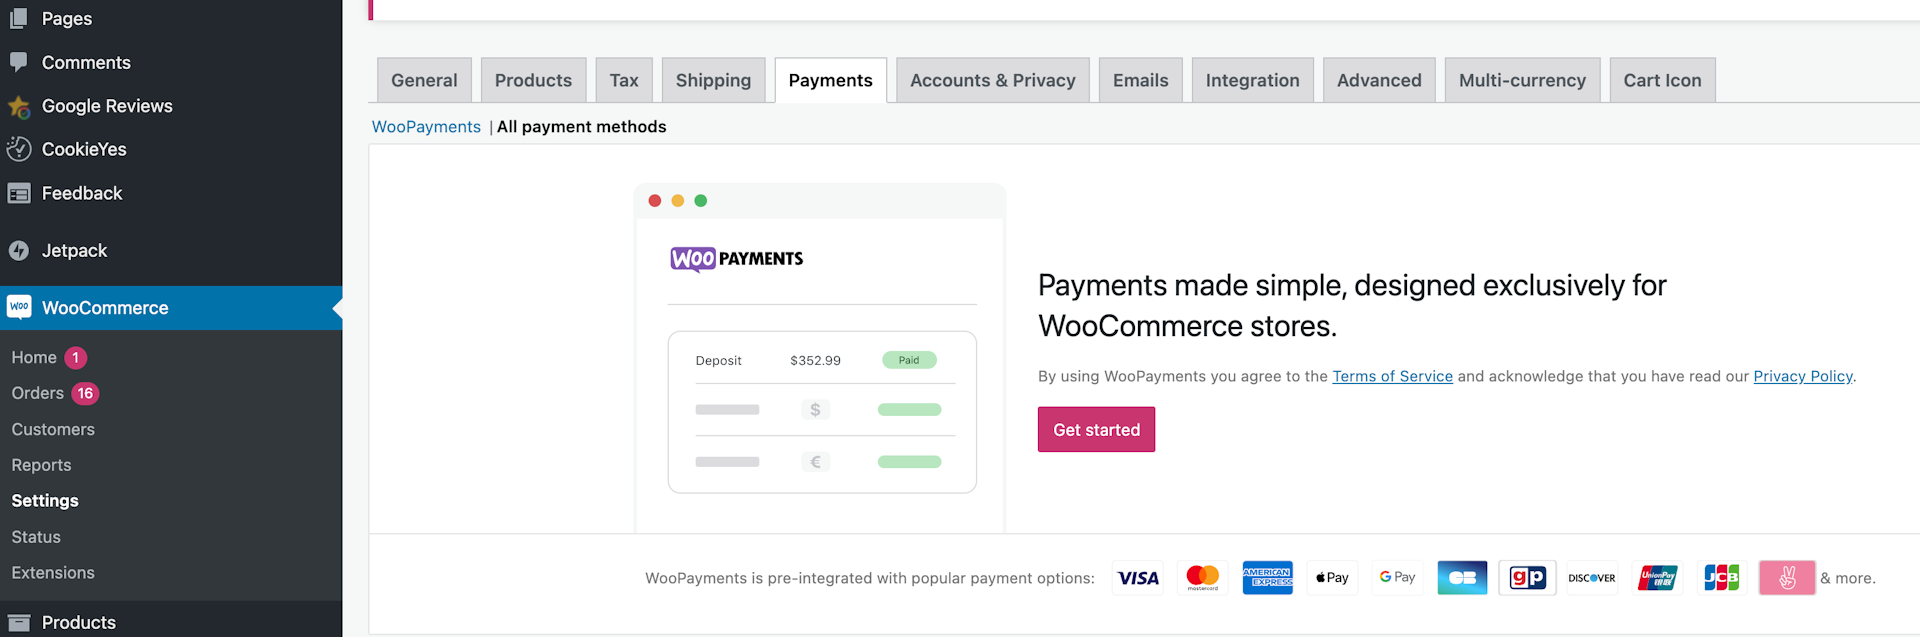
- You will see these available options:

-
The first module will need to be enabled so it appears as a payment option on the checkout. The Apple Pay module requires extra configuration, it should be deactivated. Let us now if you want to use this payment method.
-
The next step is the configuration of the first module, simply click on it and fill out the fields with the information that we will send you. You should have something like this:
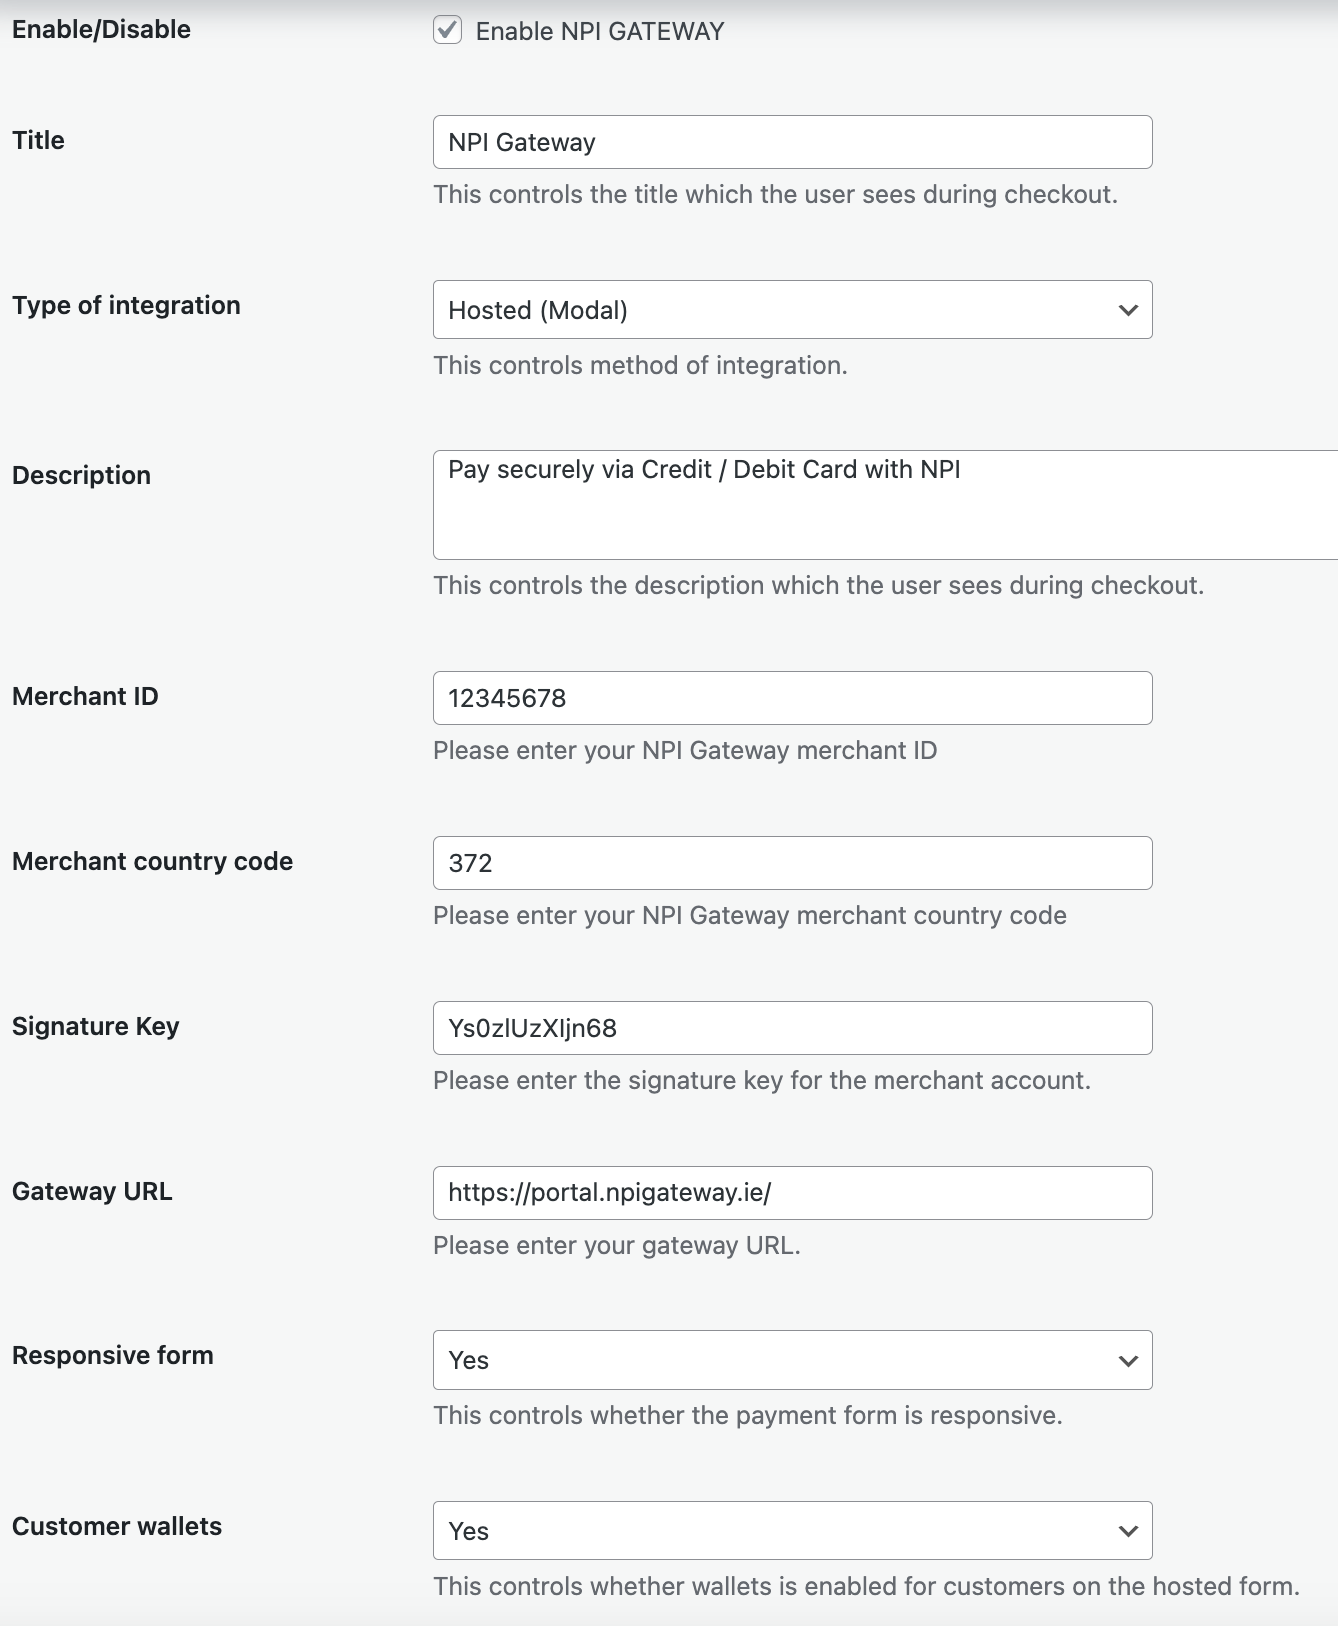
Note that the merchant country code for Ireland is 372
We reccomend to choose the Hosted (modal) type of integration since it will not display any branding. Dont forget to save changes.
Testing
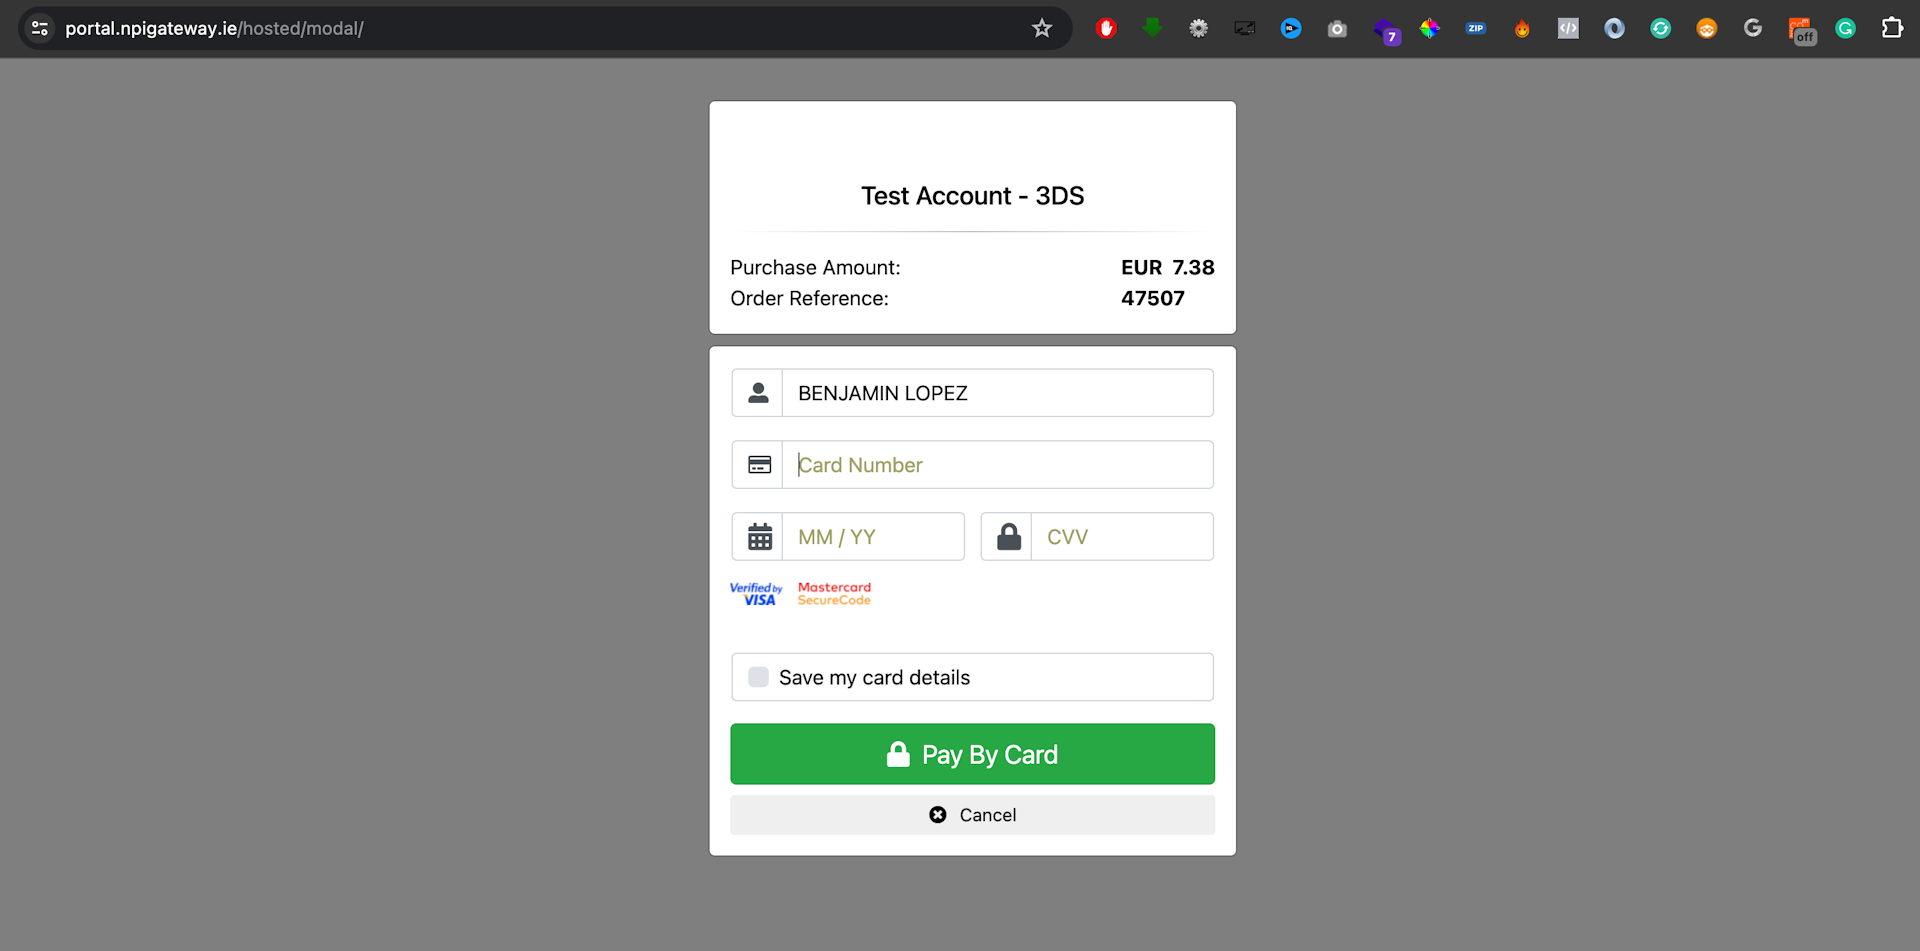
In order to test the Payment Gateway you should replace the merchant ID and signature key with the test credentials that we will give you. For confirmation, Go to the portal -> Merchant Accounts to see if you have the test account created. Once you have setting up your plugin, you need to make a transaction using our test card details. We recommend to create a test product with value of one euro.
However, for quick testing, use the following card information:
| Card Number | CVV | Address (if required) | Amount | Expiration |
|---|---|---|---|---|
| 4539791001730106 | 289 | Unit 5 Pickwick Walk 120 Uxbridge Road Hatch End Middlesex HA6 7HJ | 1.00 | 12/(next year) |
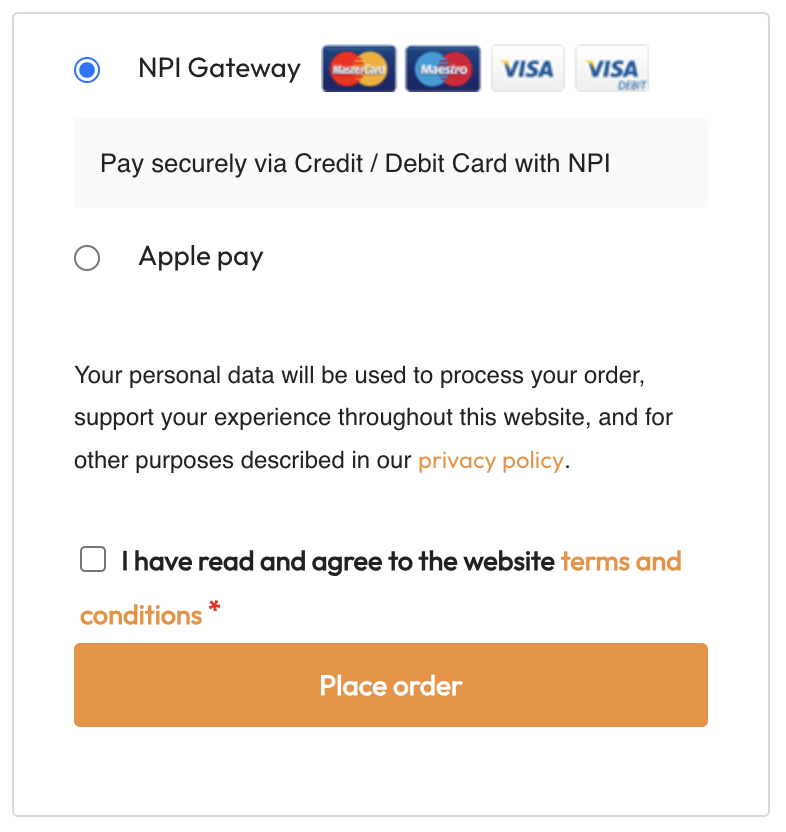
- Complete the checkout and Choose the Payment Gateway.
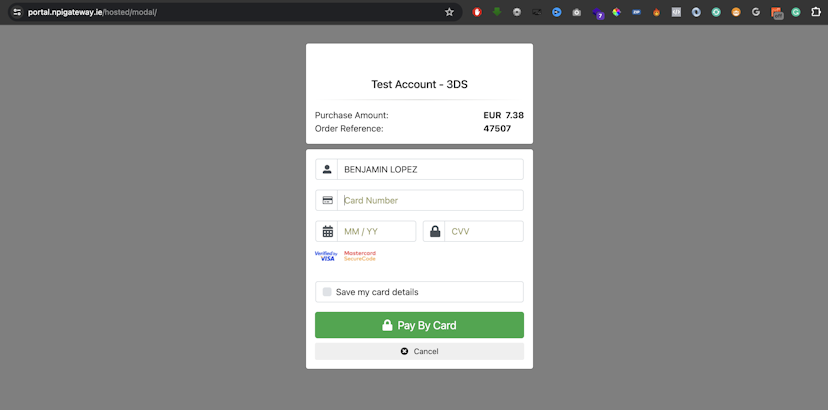
- Use your test card details and submit the payment.
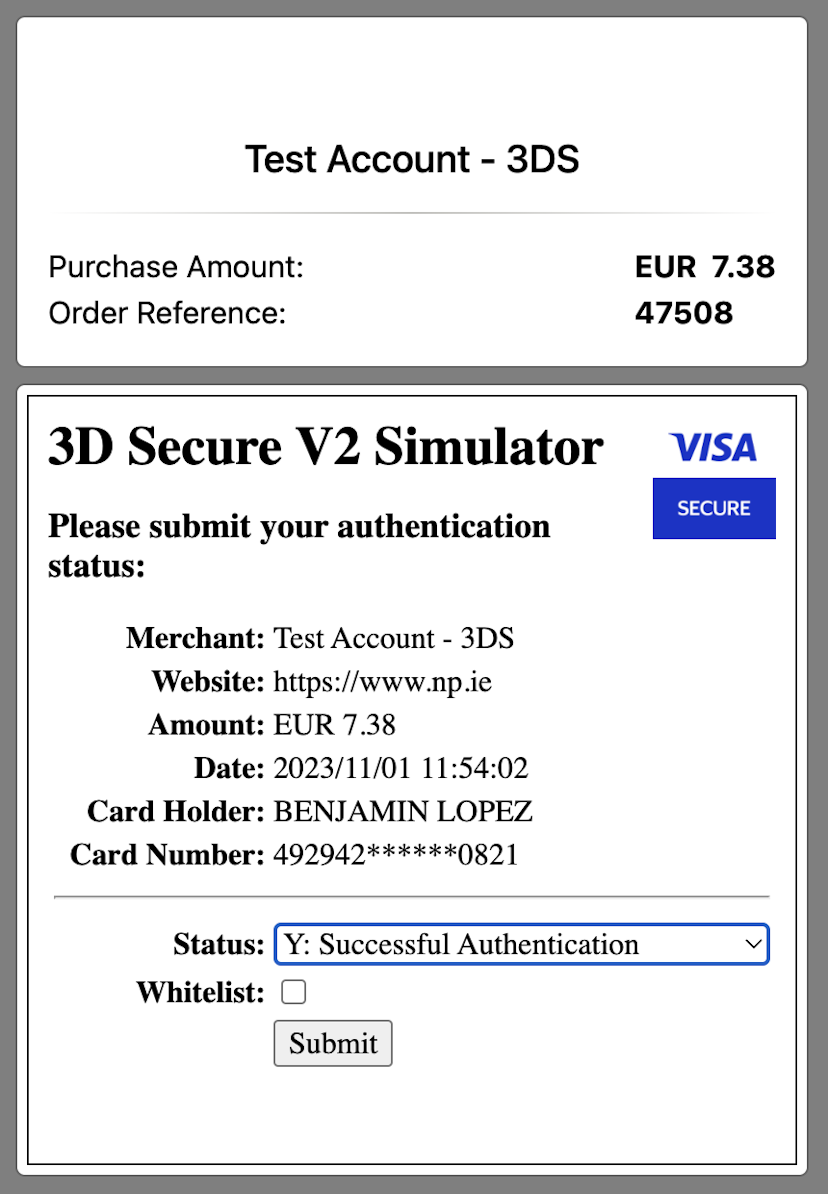
- You will see the simulator screen, change the status to "Successful Authentication" and click Submit.
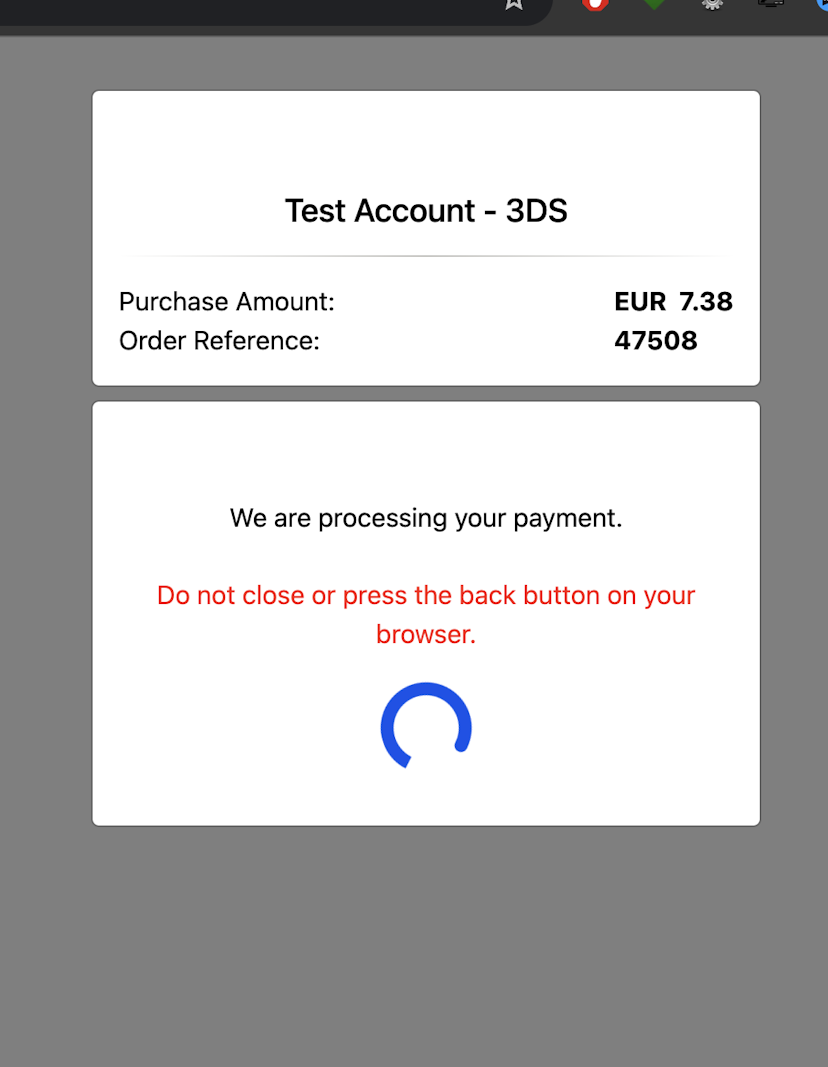
- You will see the following successful screen:

After that, you will be redirected back to your website and WooCommerce will show the order details. Now you are ready to use your production credentials.
Rebrand Instructions
The module does not require any editing of file to be used. The options can be changed via the plugin settings. However you can pre set some of the branding options by by editing the config.php file. This will allow you to set the defaults which are:
gateway_title is the title of the module that will appear to the user when selecting the payment method on the checkout. method_description is the description that appears in the payment selected on checkout. default_merchant_id is the default merchant ID the module will use. It's recommended to use a test account. default_secrect is the signature/secret for the default merchant.